Introduction to Distressing Ink Kits and Their Uses
Distressing ink kits have become an essential tool for crafters and artists looking to add a vintage or worn look to paper projects. These kits provide a versatile and effective means of transforming plain paper into something that appears aged and full of character. Ideal for scrapbooking, card-making, and other creative endeavors, distressing inks can create the illusion of time’s passage, adding depth and interest to your work.
Distressing inks are specifically designed to react with water, allowing for unique blending and shading effects. Their formulation enables easy application and manipulation, making them perfect for beginners and experienced crafters alike. Whether you’re looking to enhance the edges of a project or create a subtle antique patina, distressing inks offer a wide range of possibilities.
One of the primary uses of distressing ink kits is in the aging process, where the goal is to make new materials appear older than they are. This can be achieved through various techniques, such as sponging, brushing, or stamping, each offering different results. The inks come in a variety of colors, from muted earth tones to vibrant hues, allowing you to customize the aged effect to suit your project’s theme.
Furthermore, distressing ink kits often include additional tools like blending brushes or applicators, which help achieve an even and consistent look. They are also compatible with a range of surfaces beyond paper, including fabric, wood, and more, expanding the creative possibilities.
In summary, distressing ink kits are invaluable for those looking to infuse their projects with a sense of history and authenticity. By understanding and utilizing these kits, you can master the art of aging paper, adding a unique and personal touch to your artistic creations.
Essential Tools and Materials for Aging Paper
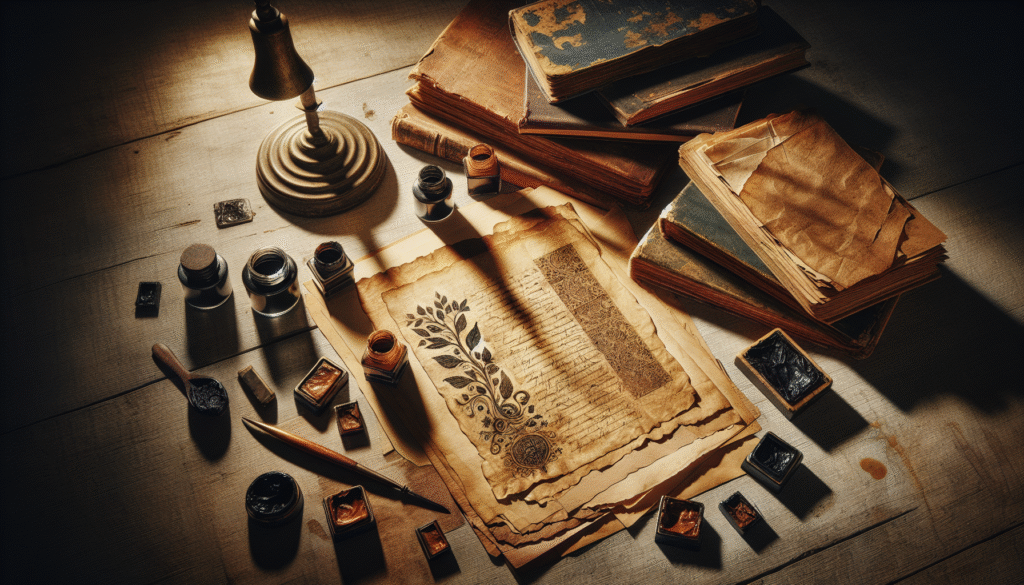
Aging paper with distressing ink kits can transform ordinary sheets into vintage treasures. To achieve the best results, it’s important to gather the right tools and materials. This section will guide you through the essentials needed for effectively using distressing inks to age paper.
Distressing Ink Kits: At the heart of the aging process are distressing ink kits. These kits usually contain a range of ink pads in various shades, allowing you to create different aged effects. Opt for high-quality ink kits for the best results.
Blending Tools: To apply the ink smoothly and achieve seamless transitions, blending tools are essential. Foam pads or blending brushes are popular choices. They help in spreading the ink evenly and creating natural-looking aged effects.
Paper: The choice of paper can significantly affect the outcome. While most papers can be aged, using thicker, more durable sheets often yields better results. Look for acid-free paper to ensure longevity and prevent further degradation over time.
Spray Bottle: A small spray bottle filled with water is useful for adding texture and depth to the paper. Spritzing the paper lightly can help the ink spread unevenly, mimicking natural aging processes.
Protective Surfaces: To protect your workspace from ink stains, use a craft mat or old newspaper. These surfaces not only safeguard your table but also make cleanup easier.
Heat Tool: A heat tool can accelerate drying times, allowing you to layer inks more efficiently. It also helps in fixing the ink into the paper, ensuring lasting effects.
By assembling these essential tools and materials, you set the foundation for mastering the art of aging paper with distressing ink kits. With the right preparation, your projects will exhibit a timeless, vintage charm.
Step-by-Step Guide to Applying Distressing Inks
Distressing inks are a versatile tool for creating aged effects on paper, lending a vintage charm to your projects. This step-by-step guide will walk you through the process of applying distressing inks effectively, ensuring a seamless and captivating finish.
Step 1: Gather Your Materials
- Distressing ink pads in desired colors
- Ink applicator tools (e.g., blending tools or sponges)
- Protective surface or craft mat
- Paper to be aged
- Optional: Masking tape or stencils for specific designs
Step 2: Prepare Your Workspace
Begin by setting up a clean, protective surface to work on. This will prevent ink from staining your work area and ensure that your project remains clean and professional.
Step 3: Apply the Base Layer
Using an ink applicator tool, gently dab the distressing ink onto the edges of your paper. Work in light, circular motions to avoid harsh lines. Start with a lighter color as the base layer, covering the entire area you wish to age.
Step 4: Layer Additional Colors
Once the base layer is dry, apply darker shades to the edges and corners for depth. Blend the colors together using the applicator tool, ensuring a smooth transition between hues. This layering technique enhances the aged appearance, mimicking natural wear and tear.
Step 5: Add Finishing Touches
For a more rustic look, consider adding splatters or unique textures using water droplets or stencils. Lightly mist the paper with water to allow the inks to react, creating a beautifully weathered effect. Allow the paper to dry thoroughly before handling.
By following these steps, you’ll master the art of applying distressing inks, transforming plain paper into a masterpiece of vintage allure. Experiment with different colors and techniques to find the perfect aged look for your project.
Creative Techniques for Unique Aging Effects
Distressing ink kits offer an excellent opportunity to infuse your paper projects with a sense of historical charm and character. By mastering a few creative techniques, you can achieve unique aging effects that set your work apart. Here, we explore several methods to inspire your artistic journey.
One of the most effective techniques is layering. Start by applying a base layer of light ink to your paper. Gradually build depth and complexity by adding darker shades on top. This approach mimics the natural aging process, where exposure to sunlight and environmental factors leads to varied discoloration.
Another popular method is the water spritzing technique. After applying distress ink, lightly mist the paper with water. The interaction between water and ink creates interesting patterns and textures, simulating wear from moisture over time. This technique is particularly effective for achieving a vintage, weathered look.
To create an aged, burnt-edge effect, gently tear the edges of your paper before applying distress ink. Focus on the torn edges, using darker shades to mimic the appearance of singed paper. This technique evokes a sense of historical intrigue, reminiscent of old documents or ancient maps.
For a more textured appearance, experiment with the crumpling technique. First, crumple the paper into a ball, then smooth it out before applying distress ink. The ink will settle into the creases and folds, enhancing the antique feel with an added layer of visual interest.
Finally, consider using stamps to introduce unique patterns and designs. Select stamps that complement your project’s theme, such as vintage script or botanical motifs. Apply distress ink to the stamps and press them onto the paper for a customized aged appearance.
By integrating these creative techniques, you can elevate your projects with unique aging effects, ensuring each piece is a distinctive work of art.
Tips for Maintaining and Storing Your Distressed Creations
Once you have mastered the art of aging paper with distressing ink kits, it is crucial to preserve your creations to ensure their longevity. Proper maintenance and storage can prevent deterioration and retain the desired aesthetic. Below are some valuable tips to help you maintain and store your distressed paper creations effectively.
1. Keep Away from Direct Sunlight
Direct sunlight can cause fading and discoloration over time. To preserve the vibrant hues of your distressed work, store them in a location away from windows or any other sources of direct sunlight.
2. Control the Environment
Humidity and extreme temperatures can significantly affect distressed paper. Aim to store your creations in a cool, dry place where temperature and humidity levels remain constant. Consider using a dehumidifier in areas prone to moisture.
3. Use Archival-Quality Materials
To protect your distressed paper from damage, use archival-quality storage materials. Acid-free folders, envelopes, and boxes will prevent acidic degradation, ensuring that your paper art remains in pristine condition.
4. Avoid Excessive Handling
Frequent handling can lead to accidental tears, smudges, or fingerprints, which may damage the delicate distressing effects. Handle your creations with care, and consider using cotton gloves if you need to touch them frequently.
5. Layer Wisely
When storing multiple pieces, avoid stacking them directly on top of one another. Place a piece of acid-free tissue paper between each item to prevent any ink transfer and reduce the risk of physical damage.
By following these guidelines, you can maintain the beauty and integrity of your distressed creations for years to come. Proper care not only preserves the aesthetic appeal but also ensures that your hard work remains a lasting testament to your artistic skills.