Introduction to Floating Wooden Shelves
Floating wooden shelves are a popular choice for homeowners and interior designers alike, offering a perfect blend of functionality and aesthetics. These sleek, minimalist shelves are designed to appear as if they are seamlessly attached to the wall without any visible brackets or supports, creating a clean and modern look that complements a wide range of interior styles.
The appeal of floating wooden shelves lies not only in their visual appeal but also in their versatility. They are ideal for displaying a variety of items, from books and artwork to decorative pieces and everyday essentials. Whether you are looking to enhance your living room, kitchen, or bedroom, these shelves can be customized to suit your specific needs and preferences.
When it comes to styling shelves, floating wooden shelves offer endless possibilities. Their understated design allows them to blend seamlessly into any space, while their wooden construction adds warmth and texture. Available in a variety of wood types, finishes, and sizes, these shelves can be tailored to match your existing décor or to stand out as a focal point in the room.
Moreover, installing floating wooden shelves is a straightforward DIY project that can be completed with just a few essential tools and materials. With a little patience and attention to detail, you can transform an empty wall into a stylish and functional storage solution. In the following sections, we will guide you through the process of selecting the right materials, installing your shelves, and creatively styling them to enhance your home’s aesthetic appeal.
Whether you are a seasoned DIY enthusiast or a novice looking to try your hand at a new project, floating wooden shelves offer a rewarding and impactful way to elevate your interior space.
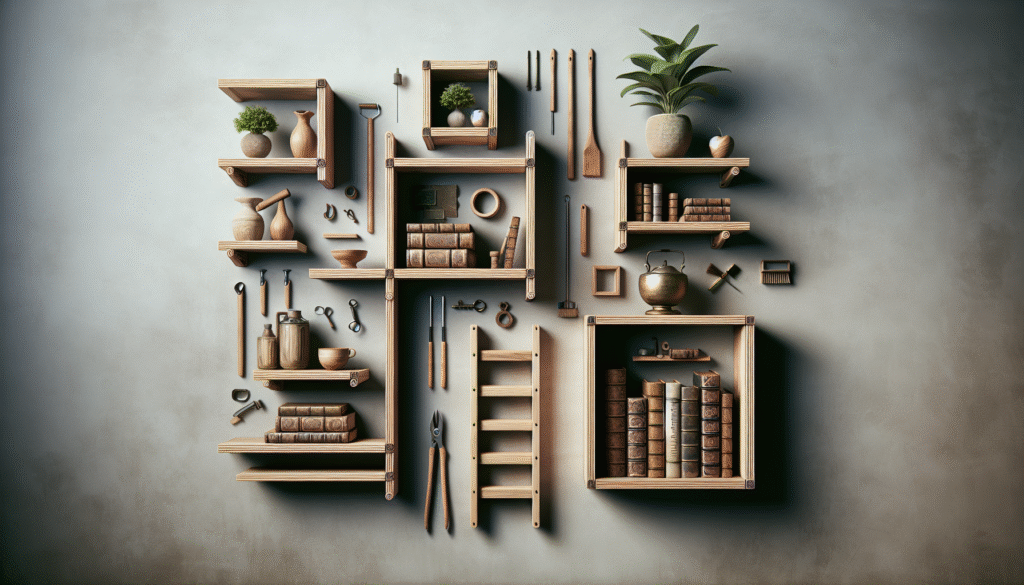
Essential Tools and Materials for DIY Installation
Embarking on a DIY project to install floating wooden shelves requires careful preparation and the right set of tools and materials. Ensuring you have everything you need before starting the installation will make the process smoother and more efficient. Below, we outline the essential items you’ll need to successfully complete your project.
Tools:
- Drill: A power drill is essential for making precise holes in the wall to secure your shelves. Make sure you have the appropriate drill bits for the wall type you are working with.
- Level: A level is crucial to ensure your shelves are installed straight and even, which not only looks better but also prevents items from sliding off.
- Stud Finder: A stud finder helps locate wall studs, which are necessary for securely anchoring your shelves and ensuring they can support weight.
- Measuring Tape: Accurate measurements are key to properly aligning your shelves and ensuring they fit in the desired space.
- Screwdriver: Both a manual and electric screwdriver may be needed to tighten screws and secure brackets.
Materials:
- Floating Shelf Brackets: Choose brackets that are suitable for the size and weight of your shelves. They should be sturdy and capable of supporting the intended load.
- Wooden Shelves: Select wooden shelves that complement the decor of your space. Ensure they are pre-cut to the desired length or plan to cut them yourself.
- Screws and Anchors: Use appropriate screws and wall anchors to secure the brackets. The size and type will depend on your wall material.
- Pencil: A pencil is essential for marking measurements and drilling points on the wall.
By gathering these tools and materials ahead of time, you’ll be well-prepared to tackle the installation of your floating wooden shelves with confidence and precision.
Step-by-Step Guide to Installing Floating Wooden Shelves
Installing floating wooden shelves can enhance the aesthetic and functionality of any room. Follow this step-by-step guide to ensure a successful DIY installation.
-
Plan the Placement:
Start by deciding where you want to install your shelves. Consider the height and spacing to ensure they align with your room’s design and purpose. Use a pencil to mark the desired position on the wall.
-
Locate Wall Studs:
Use a stud finder to locate wall studs, which will provide the necessary support for your shelves. Mark the stud locations lightly with a pencil.
-
Measure and Mark:
Measure the length of the shelf and mark the drilling points. Ensure these points align with the wall studs for maximum stability.
-
Drill Pilot Holes:
Using an appropriate drill bit, create pilot holes at the marked locations. Pilot holes will prevent the wood from splitting and make it easier to screw in the brackets.
-
Attach the Brackets:
Secure the brackets to the wall using screws. Ensure they are level by using a spirit level before tightening the screws completely.
-
Mount the Shelves:
Place the wooden shelves onto the brackets. Use a level to confirm they are even. If adjustments are needed, make them before securing the shelves with additional screws if necessary.
-
Final Touches:
Double-check the stability of the shelves. Make sure they are securely fastened and can bear the intended weight. Once satisfied, they are ready for styling and use.
By following these steps, you can ensure your floating wooden shelves are installed securely and enhance the style of your home.
Creative Ideas for Styling Your Floating Shelves
Floating wooden shelves offer a versatile platform for showcasing your personal style while adding a functional element to any room. Here are some creative ideas to help you style your shelves effectively:
- Group Items by Theme: Consider arranging items according to a particular theme. For instance, you could display a collection of vintage cameras, books, and small succulents for a nostalgic, eclectic vibe.
- Play with Height and Layering: Vary the height of objects to create visual interest. Stack books horizontally and place a decorative item on top to add depth. Using items of different heights and sizes can make the display more dynamic.
- Color Coordination: Select items that complement the room’s color scheme. You might choose to display objects in similar hues or opt for contrasting colors to make a bold statement.
- Mix Textures and Materials: Combine different textures like glass, wood, and metal. This can enhance the tactile appeal and richness of your shelf display, making it more engaging to the eye.
- Personal Touch: Add personal items such as family photos or travel souvenirs. These elements can make your shelves feel unique and reflect your personality.
- Seasonal Decor: Refresh your shelves with seasonal decorations. In spring, you might include fresh flowers or pastel colors, while in winter, you could opt for muted tones and cozy accents like candles.
- Balance and Symmetry: Maintain balance by placing larger items at opposite ends of the shelf. This helps in creating a visually pleasing arrangement that is not too cluttered or chaotic.
By experimenting with these styling techniques, you can create floating shelves that are not only functional but also serve as an eye-catching focal point in your home. Remember, the key is to reflect your taste while ensuring that the shelves enhance the overall aesthetic of the space.
Maintenance Tips and Common Troubleshooting for Floating Shelves
Floating wooden shelves offer both functionality and aesthetic appeal, but to ensure their longevity and performance, proper maintenance is essential. This section provides practical tips for maintaining your shelves and addresses common issues that may arise.
Regular Maintenance
- Dusting: It’s important to regularly dust your shelves with a soft cloth to prevent the accumulation of dirt and debris. This simple task will help maintain the natural beauty of the wood.
- Cleaning: Use a mild cleaning solution and a damp cloth to clean the shelves. Avoid harsh chemicals that could damage the wood’s finish.
- Inspecting: Periodically check the shelves for any signs of wear or damage, such as scratches or dents. Addressing issues early can prevent more significant problems later.
Common Troubleshooting
Despite careful installation and maintenance, floating shelves can encounter a few common issues. Here are some solutions:
- Sagging Shelves: If you notice your shelves beginning to sag, it might be due to excessive weight or improper installation. Remove some items to reduce the load and ensure the brackets are securely attached to the wall studs.
- Loose Brackets: Over time, brackets can become loose. Tighten any screws and ensure that the brackets are firmly secured. If necessary, use wall anchors to provide additional support.
- Water Damage: Wood can warp or discolor if exposed to moisture. Keep your shelves dry and immediately clean up any spills to prevent water damage.
By following these maintenance tips and troubleshooting techniques, you can ensure that your floating wooden shelves remain a stylish and functional addition to your space for years to come.